How to Sell Digital Resources on Made by Teachers: A Complete Guide for Educators
Did you know that top teacher-sellers on educational marketplaces can earn over $100,000 annually by sharing their classroom resources? Made by Teachers offers educators a fantastic platform to monetize their teaching materials and help fellow teachers succeed. As a former teacher turned successful digital resource creator, I’m excited to share everything you need to know about turning your teaching expertise into a profitable side hustle! Whether you’re creating worksheets, lesson plans, or digital activities, this guide will walk you through the entire process of becoming a successful seller on Made by Teachers.
Getting Started with Made by Teachers
Let me share my journey into selling digital resources on Made by Teachers and help you get started on the right foot. I remember feeling both excited and overwhelmed when I first decided to sell digital resources on Made by Teachers back in my early teaching days. Now, after years of experience, I can walk you through everything you need to know.
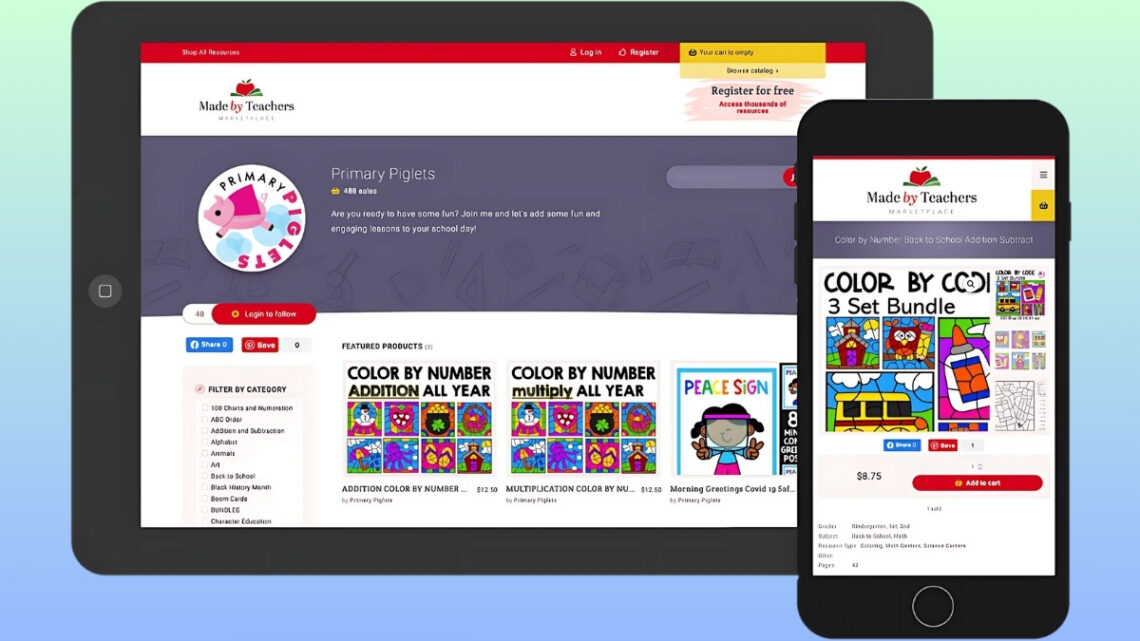
First things first – creating your seller account is surprisingly straightforward. Head over to Made by Teachers’ homepage and click the “Become a Seller” button in the top navigation. You’ll need to provide basic information like your email, teaching credentials, and preferred payment details. Pro tip: use a professional email address rather than that fun one from college (learned that one the hard way!).
Setting up your store profile is where you really get to shine. Think of it as your digital classroom door – you want it to look welcoming and professional. Upload a clear profile photo (I used a simple headshot against a plain background) and write a bio that highlights your teaching experience and specialties. Don’t forget to mention your grade levels and subject areas – this helps buyers find exactly what they’re looking for.
Now, before you start uploading resources, you absolutely need to familiarize yourself with Made by Teachers’ content guidelines. Trust me, nothing’s worse than spending hours creating materials only to have them rejected. The platform has strict requirements about image quality, font usage, and citations. They also have specific rules about what can and can’t be included in resources – for instance, copyrighted characters are a big no-no.
Let’s talk tools. To successfully sell digital resources on Made by Teachers, you’ll need some essential software. PowerPoint or Google Slides are must-haves for creating worksheets and presentations. I also recommend investing in a good PDF editor – I learned this after struggling with formatting issues in my first few resources. For creating eye-catching covers and graphics, Canva has been an absolute game-changer. You might also want to consider a basic photo editing tool for touching up images.
Understanding the financial side is crucial. Made by Teachers takes a commission from each sale – currently 20% for basic sellers. This might seem steep at first, but remember that they’re handling all the hosting, payment processing, and platform maintenance. Your earnings are paid out monthly via PayPal or direct deposit, as long as you meet the minimum threshold of $10.
Here’s something I wish someone had told me early on: organization is key! Create a folder system on your computer for all your resources, including separate folders for works-in-progress, completed products, and marketing materials. I spent way too many hours hunting down files before I got organized.
The platform’s search algorithm favors detailed product descriptions and appropriate tagging. When uploading resources, take time to write comprehensive descriptions using relevant keywords. Think about what other teachers would search for when looking for your type of resource. Speaking from experience, well-tagged resources typically perform better in search results.
One aspect that surprised me was the seasonal nature of selling on Made by Teachers. August and January are typically huge months for teacher resources, while sales often slow down during summer breaks. Plan your content creation schedule accordingly, and try to have seasonal resources ready at least a month before they’re needed.
Remember, success doesn’t happen overnight. Focus on creating high-quality resources that genuinely help other teachers. My first month selling digital resources on Made by Teachers brought in exactly $12.45, but with persistence and improvement, it grew into something much more substantial.
Have you gathered all your teaching materials and started thinking about what unique resources you could bring to the platform? Starting your journey as a seller on Made by Teachers might feel daunting, but with these guidelines and a bit of determination, you’ll be on your way to sharing your expertise with teachers worldwide.
Creating High-Quality Digital Resources
Finding out what teachers actually need was my first big challenge. I started by joining teaching Facebook groups and really listening to what educators were discussing. You’d be amazed at how many great product ideas come from simply paying attention to the questions teachers ask repeatedly! I also learned to check curriculum maps from different states and browse the “Most Wished For” section on Made by Teachers – total game-changer for understanding market demands.
When it comes to design, I’ve made pretty much every rookie mistake possible. Here’s what I’ve learned: clean and consistent is always better than flashy. I stick to 2-3 fonts maximum per resource (one for headers, one for body text), and I use a consistent color scheme throughout. White space is your friend – I used to try cramming everything onto one page, but giving content room to breathe makes such a difference in usability.
Let’s talk about standards alignment – this is crucial if you want to sell digital resources on Made by Teachers successfully. I keep a spreadsheet of common core and state standards handy while creating resources. Pro tip: include the specific standards covered right in your product description. This saves teachers time and shows you’ve done your homework. I learned this after getting multiple questions about standards alignment in my early days.
Quality control is something I’m pretty obsessive about now, after learning some hard lessons. Here’s my testing checklist that I wish I’d had years ago:
For digital worksheets and activities:
- Check every single link (yes, even the obvious ones)
- Test all interactive elements in different PDF readers
- Verify that all fonts are embedded properly
- Double-check spelling and grammar (I use Grammarly AND have a colleague review)
- Test print in both color and black/white
- Verify that answer keys match questions exactly
For PowerPoint or Google Slides:
- Check animations and transitions on different devices
- Verify that all embedded media plays correctly
- Test font compatibility across platforms
- Ensure slides are formatted consistently
The little details matter so much. I remember getting feedback about unclear instructions in one of my first resources – now I have at least two other teachers test each resource before listing it. They always catch things I miss, no matter how many times I’ve reviewed it myself.
Here’s something nobody told me: creating differentiated versions of your resources is incredibly valuable. I now make at least three difficulty levels for most of my materials. Yes, it takes more time, but teachers really appreciate having options for different learner needs.
File organization has become crucial as my resource library has grown. I maintain a master template for each type of resource I create, with my standard fonts, colors, and layouts already set up. This not only saves time but ensures consistency across all my products.
Digital accessibility is another aspect I’ve learned to prioritize. Making sure resources are screen-reader friendly and providing alternative text for images isn’t just good practice – it’s essential for reaching all learners. I use heading styles properly and maintain good color contrast in all my materials.
One of my proudest moments was receiving an email from a special education teacher who said my differentiated math activities worked perfectly for her diverse classroom. That’s when I realized that creating truly helpful resources isn’t just about making sales – it’s about making a real difference in teachers’ and students’ lives.
Have you thought about what unique perspective or expertise you could bring to your resources? Remember, the goal isn’t just to create another worksheet or activity – it’s about solving real problems for real teachers in their classrooms.
Want to know the best part about putting in all this effort for quality? Not only do high-quality resources get better reviews and more repeat customers, but they also require far fewer updates and revisions down the line. It’s definitely worth investing the time upfront to get things right.
Pricing Your Educational Resources
When I first started to sell digital resources on Made by Teachers, pricing was honestly one of the trickiest aspects to figure out. I remember staring at my first resource – a detailed novel study guide I’d spent weeks creating – and having absolutely no idea what to charge. Should I price it low to attract buyers? Go high to reflect the work I’d put in? It was definitely a learning experience!
After plenty of trial and error, I’ve discovered that competitive analysis is your best friend when it comes to pricing. I spend time regularly browsing similar resources in my subject area and grade level. But here’s the thing – don’t just look at prices. Pay attention to page counts, complexity, and those all-important ratings and reviews. I learned this lesson after initially underpricing a comprehensive science unit that took me ages to create!
Setting base prices really comes down to understanding your resource’s value. These days, I use a pretty specific formula: basic worksheets typically start at $2-3, while more complex resources like complete units or extensive project materials might go for $12-15. One thing I’ve noticed is that teachers are willing to pay more for resources that save them significant prep time or offer unique teaching approaches.
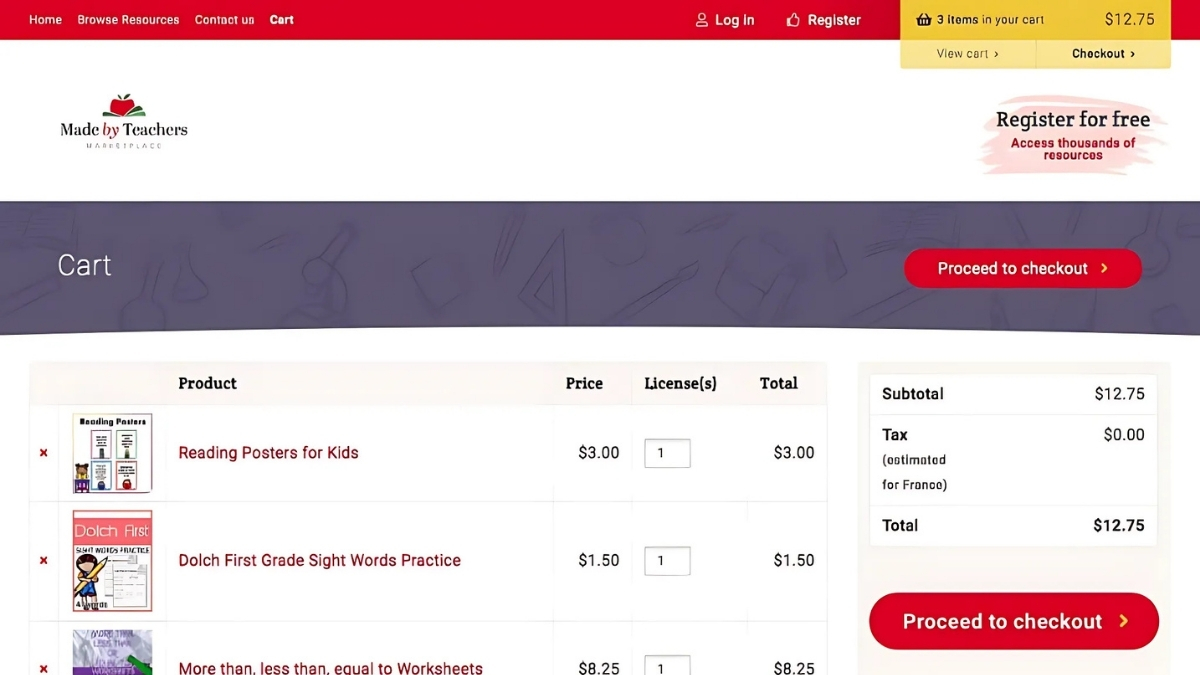
When it comes to selling digital resources on Made by Teachers effectively, bundle pricing has been a total game-changer for my store. I usually price bundles to save buyers about 20-25% compared to buying items individually. At first, I worried this would cannibalize my individual sales, but it actually increased my overall revenue. Teachers love getting a deal, and bundles often encourage them to try resources they might not have purchased separately.
Let me share a seasonal pricing strategy that took me way too long to figure out. During back-to-school season (late July through September), teachers have fresh budgets and are actively looking for new resources. This is when I maintain firm pricing on my most popular items. However, during slower periods like March or April, I might run special promotions or sales to boost traffic to my store.
Here’s something I learned the hard way: don’t undervalue your work! In my early days, I priced everything super low, thinking it would lead to more sales. Instead, it actually made my resources appear less valuable to buyers. When I gradually increased my prices to match market rates, my sales actually improved – plus, I could invest more time in creating quality materials.
Special offers and promotions need careful planning. I now coordinate my sales with Made by Teachers’ site-wide promotional events for maximum visibility. Pro tip: create themed bundles for major teaching units or holidays and promote them about a month before they’re typically taught. My Halloween-themed math bundle sells like crazy in September!
One pricing strategy that’s worked really well for me is offering tiered versions of popular resources. For example, I might sell a basic version of a unit plan for $8, then offer an expanded version with additional activities and differentiated materials for $15. This gives teachers options based on their needs and budget.
I’ve also found success with what I call the “starter pack” approach. These are smaller, lower-priced versions of larger resources that let teachers test out my teaching style and material quality before investing in more expensive items. It’s like offering a free sample at the grocery store – once they see the quality, they’re more likely to come back for more.
Remember to regularly review and adjust your prices. I now do a quarterly analysis of my best-selling items and adjust prices based on sales data and feedback. Sometimes, a small price adjustment can make a big difference in your conversion rate.
Have you looked at what similar resources in your subject area are selling for? Understanding your market is crucial for pricing strategy, but don’t forget that unique, high-quality resources can often command premium prices. The key is making sure your resources provide clear value to teachers.
And here’s one final piece of advice: keep detailed records of your pricing experiments and their results. What works during back-to-school season might flop during winter break. The more data you have, the better equipped you’ll be to make smart pricing decisions that maximize both sales and satisfaction.
Optimizing Your Product Listings
Let’s talk titles first – they’re like the front door to your resource. I learned to front-load my titles with the most important information (grade level, subject, and resource type). For example, instead of “Fun Activities for Learning Fractions,” I use “4th Grade Fractions Worksheets & Games – Common Core Aligned.” See the difference? The second one tells teachers exactly what they’re getting and who it’s for.
Creating thumbnails was my nemesis for months! Here’s what finally worked: I started using a consistent template with my branding colors, but I make each preview image unique enough to stand out. I always include a clear shot of an actual page from the resource – teachers want to see what they’re buying, not just pretty graphics. One of my biggest mistakes was using dark backgrounds that didn’t show up well in search results.
Keywords are absolutely essential when you sell digital resources on Made by Teachers. I keep a running list of seasonal terms, educational buzzwords, and specific curriculum terminology. But here’s the trick – don’t just stuff them in randomly. I weave them naturally into my descriptions, focusing on terms teachers actually use when searching. “Morning work” performs better than “bell ringer activities,” even though they’re essentially the same thing.
Product descriptions need to tell a story. I structure mine like this:
- First paragraph: Quick overview of what’s included
- Second paragraph: Specific features and benefits
- Third paragraph: How to use the resource in the classroom
- Final section: Technical details (page count, file formats, etc.)
I learned something interesting about preview files too. Instead of just showing the first few pages, I now create a specific preview that highlights the best parts of the resource. It’s like creating a movie trailer – you want to show enough to get them interested but not give everything away.
Categories and subcategories matter more than you might think. I spent an afternoon reorganizing all my listings into more specific subcategories, and my views increased significantly. Don’t just pick the obvious categories – think about all the different ways teachers might search for your resource.

Here’s a funny story – I once accidentally left out the grade level in my description and got a bunch of messages asking if the resource was suitable for different grades. Now I have a checklist I go through for every listing to make sure I include all the essential information:
- Grade level(s)
- Subject area
- Standards alignment
- Time required
- Materials needed
- Digital/print format specifications
One game-changing tip I discovered: include common questions or problems your resource solves right in the description. For example, “Struggling to teach long division to visual learners?” This speaks directly to teachers’ pain points and helps them find solutions.
Don’t forget about seasonal keywords and tags! I update my listings about a month before major teaching units typically start. Those Valentine’s Day math centers get a lot more views when I refresh their keywords in January rather than February.
The preview images you include can make or break your sales. I always show:
- A clear cover page
- Sample student pages
- Any special features (like digital interactive elements)
- Answer keys or teacher notes (partially obscured)
- Real classroom examples when possible
Have you thought about the search terms teachers might use when looking for your type of resource? Understanding your audience’s language is key to being found in searches. Remember, teachers often search the way they talk to each other, not necessarily using formal educational terms.
Testing different description formats has taught me that bullet points and short paragraphs work better than long blocks of text. Teachers are busy – they want to quickly scan and understand what they’re getting. I now break up my descriptions with clear headings and plenty of white space.
Lastly, don’t forget to update your listings periodically. I set a reminder to review my older products every few months, updating seasonal tags, refreshing descriptions, and adding any new relevant keywords. It’s amazing how a simple refresh can breathe new life into older resources!
Marketing Your Made by Teachers Store
When I first decided to sell digital resources on Made by Teachers, I thought great products would sell themselves. Ha! Let me tell you, I quickly learned that marketing is just as important as creation. After months of crickets in my store, I finally got serious about promoting my resources, and it made all the difference.
Building a brand within the Made by Teachers community took time and consistency. I started by choosing a consistent store name, logo, and color scheme that reflected my teaching style. But here’s what really helped – I began actively participating in the Made by Teachers forums, answering questions, and sharing teaching tips without constantly promoting my products. It’s like being that helpful colleague in the teachers’ lounge rather than the pushy salesperson at the mall.
Social media was a game-changer for my store. I created a dedicated Instagram account for my teaching resources, sharing daily classroom tips and behind-the-scenes peeks at my resource creation process. One strategy that worked surprisingly well was creating “teaser” posts showing snippets of new resources before launch. The anticipation really helped drive initial sales!
Let me share a rookie mistake I made with email marketing. Initially, I was hesitant to start an email list, thinking “Who wants another newsletter?” Well, turns out lots of teachers do! I started offering a free high-quality resource in exchange for email signups, and my list grew faster than I expected. Now I send monthly newsletters with teaching tips, exclusive discounts, and sneak peeks of upcoming resources.
When it comes to selling digital resources on Made by Teachers successfully, cross-promotion has been crucial. I collaborate with other teacher-authors who create complementary resources. For example, I focus on math resources, so I partner with ELA creators for joint promotions. We both benefit from reaching each other’s audiences.
Pinterest has been an absolute goldmine for my store traffic. I create vertical pins showcasing my resources in action, with clear text explaining the benefits. Pro tip: create multiple pins for each resource, testing different images and descriptions to see what resonates best with teachers.
Building relationships with customers has paid off enormously. I respond to every comment and question promptly, and I’ve created a feedback group where teachers can test new resources before launch. Their input has been invaluable, and many have become loyal customers who recommend my resources to colleagues.
One marketing strategy I wish I’d started sooner is maintaining a teaching blog. It’s not just about promoting products – I share genuine teaching insights, classroom management tips, and creative lesson ideas. This establishes expertise in my niche and naturally leads teachers to my Made by Teachers store.
Here’s something that surprised me – seasonal marketing needs to start way earlier than you’d think. I now plan my promotional calendar months in advance. Back-to-school marketing starts in July, Halloween in September, and so on. Teachers are always planning ahead, and your marketing should too!

Video marketing has become increasingly important. I create short tutorials showing how to use my digital resources effectively in the classroom. These go on my YouTube channel and get shared across my other platforms. Seeing resources in action helps teachers envision using them in their own classrooms.
Have you considered which marketing channels align best with your teaching style and target audience? Remember, you don’t need to be everywhere – it’s better to do a few channels really well than spread yourself too thin.
I’ve learned that authenticity in marketing is everything. Teachers can spot inauthentic promotion from a mile away. Share your real classroom experiences, including the challenges. When I started being more open about my own teaching struggles and how I created resources to address them, my connection with customers deepened significantly.
Remember to track your marketing efforts. I use a simple spreadsheet to monitor which platforms drive the most traffic and sales to my store. This helps me focus my time and energy on what’s actually working, rather than trying to maintain a presence everywhere.
And finally, don’t underestimate the power of word-of-mouth marketing. Happy customers who see real results with your resources become your best advertisers. I encourage satisfied customers to share their experiences and occasionally offer referral incentives for bringing new teachers to my store.
Managing Your Store Successfully
Customer service turned out to be way more time-consuming than I expected. After some late nights answering messages, I finally got smart about it. I created a document with templated responses for common questions, but I always personalize them before sending. One of my best moves was setting up an FAQ section in my store profile – this alone cut down my customer service time by about half!
Let’s talk about the nitty-gritty of tracking sales. I learned the hard way that you need to monitor more than just your total earnings. Now I track metrics like:
- Which resources sell best during different seasons
- Average rating per product category
- Customer return rate
- Time spent on customer service per week
- Revenue per resource type
Managing feedback and reviews used to keep me up at night. Negative reviews felt like personal attacks at first! But I developed a system: respond to every review within 24 hours, positive or negative. For critical feedback, I take a deep breath, wait an hour before responding, and always focus on how I can help solve the issue. Some of my most loyal customers started with a negative review that I handled professionally.
When it comes to selling digital resources on Made by Teachers successfully, time management is absolutely crucial. I block out specific times for store management tasks:
- Monday mornings for customer service
- Wednesday afternoons for creating new resources
- Friday evenings for analyzing weekly performance
- Sunday evenings for planning the week ahead
Here’s something nobody tells you – burnout is real when you’re both teaching and running a store. I learned to set boundaries after nearly hitting a wall. Now I have a strict “no store work after 7 PM” rule, and I take weekends off except for my Sunday planning session. Your store won’t flourish if you’re exhausted!
Data analysis became my secret weapon for growth. I created a simple spreadsheet to track monthly trends, bestsellers, and customer feedback patterns. This helps me make informed decisions about what resources to create next. For example, I noticed my upper elementary math games consistently outperformed other products, so I focused on creating more of those.
Review management was tricky to figure out. I now have a three-step approach:
- Read the review carefully and identify the core issue
- Respond promptly with understanding and a solution
- Use the feedback to improve the resource if needed
One thing that really helped was creating systems for everything. I have checklists for:
- New product launches
- Monthly store maintenance
- Customer service responses
- Quarterly performance reviews
- Resource updates
The biggest game-changer was setting up automated systems where possible. I use scheduling tools for social media posts and have email templates ready for different situations. This saves hours each week that I can spend on creating new resources or, you know, actually having a life!
Have you thought about what systems you’ll need to keep your store running smoothly? Start small and build up – you don’t need everything perfect from day one.
Sometimes the hardest part is knowing when to step back. I schedule regular breaks and make sure to take time off during school holidays. The store will still be there when you get back, and you’ll return with fresh energy and new ideas.
Remember, running a successful store is a marathon, not a sprint. Focus on sustainability over quick wins. It’s better to grow slowly and steadily than to burn out trying to do everything at once. Your teaching career comes first – the store should support that, not compete with it.
And here’s my final piece of advice: celebrate your wins, no matter how small. Every sale, positive review, and happy customer is worth celebrating. This journey can be challenging, but it’s incredibly rewarding when you find that sweet spot between teaching and entrepreneurship.
Success on Made by Teachers comes from combining quality educational resources with smart business strategies. By following this guide, you’ll be well-equipped to start and grow your digital resource business. Remember, the key is to start with a few high-quality products and gradually expand your offerings based on customer feedback and market demands. Ready to share your teaching expertise with educators worldwide? Your Made by Teachers journey starts now!


You May Also Like

Top Strategies for Making Money with SEO (Search Engine Optimization)

How to Make Money Blogging in 2025: 11 Proven Ways to Monetize Your Blog
