How to Become a Boom Learning Publisher in 2025: A Complete Guide for Educators
Did you know that over 2 million teachers worldwide use Boom Cards™ in their classrooms? That’s right – and the demand for high-quality digital learning resources has never been higher! As a former teacher turned Boom Learning publisher, I can tell you that creating and selling digital resources isn’t just rewarding – it can also be a fantastic way to earn additional income. In this comprehensive guide, I’ll walk you through everything you need to know about becoming a successful Boom Learning publisher.
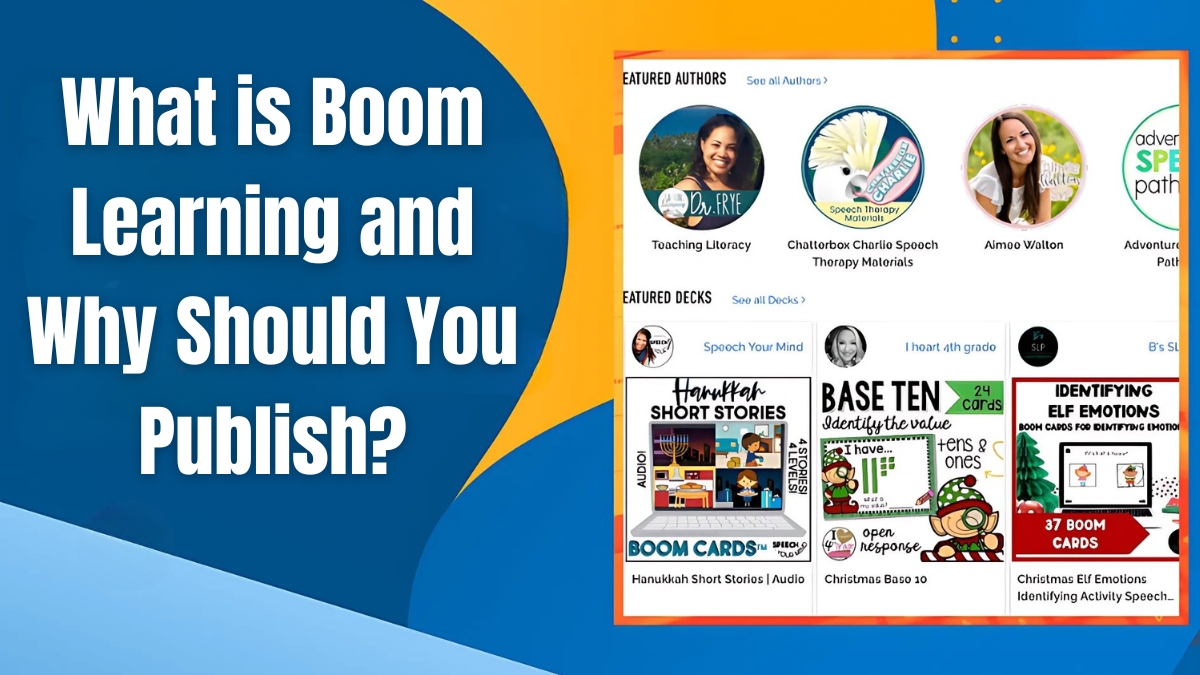
What is Boom Learning and Why Should You Publish?
What exactly is Boom Learning? Think of it as Netflix meets Teachers Pay Teachers, but for interactive digital task cards. These aren’t your regular old PDF worksheets – we’re talking about self-grading digital cards that actually give students immediate feedback. Game changer, right? When I decided to become a Boom Learning publisher, I honestly wished I’d started sooner.
Let me paint you a picture of my first experience using Boom Cards in my classroom. Picture 28 squirmy third graders, all usually distracted during math practice. But when I introduced our first multiplication facts Boom deck? Complete engagement! The instant feedback and interactive elements had them hooked. That’s when I knew I needed to create my own resources.
The pandemic really shook things up in the educational resource market. According to recent data, digital learning platform usage increased by over 300% during 2020-2021, and guess what? That trend isn’t going anywhere. More and more teachers are searching for quality digital resources, making it the perfect time to become a Boom Learning publisher.
Now, let’s talk money (because hey, we all have bills to pay!). While earnings vary widely, I’ve seen fellow publishers make anywhere from $200 to $5000+ monthly selling their Boom Cards. My first deck – a basic sight words set – earned just $47 in its first month. But as I improved my craft and expanded my store, those numbers grew significantly. The best part? It’s passive income once you’ve created the resource.
What makes Boom Cards different from traditional teaching resources? For starters, they’re self-grading (hallelujah!). Remember those late nights scoring worksheets? Yeah, those are history. Plus, you can include audio instructions, making them perfect for young learners or ESL students. The interactive elements allow for drag-and-drop activities, multiple choice questions, and even recording capabilities – things you just can’t do with paper worksheets.
Here’s something that surprised me: Boom Cards actually collect data on student performance. Teachers can track progress in real-time and adjust their instruction accordingly. When I learned this feature existed, it completely changed how I designed my resources. Now I create my decks with built-in scaffolding and differentiation options.
I’ll be honest – there was definitely a learning curve when I first started. Creating digital resources requires different skills than making traditional worksheets. But Boom Learning provides excellent tutorials and support for new publishers. Plus, the community of fellow creators is incredibly supportive. I still remember getting stuck on adding audio to my cards and having another publisher walk me through the process step by step.
The platform really shines when it comes to versatility. Whether you’re teaching phonics, math concepts, science vocabulary, or even music theory, there’s a way to create engaging Boom Cards for it. I’ve seen publishers create everything from basic letter recognition decks to complex middle school algebra concept practices.
If you’re on the fence about whether to become a Boom Learning publisher, consider this: the digital education market is projected to reach $350 billion by 2025. That’s a lot of teachers looking for quality resources! Plus, once you create a deck, it can generate income for years to come. My holiday-themed multiplication deck from three years ago still sells consistently every December.
Remember though – success doesn’t happen overnight. It takes time to learn the platform, understand what teachers need, and create quality resources. But if you’re passionate about education and willing to put in the work, becoming a Boom Learning publisher can be both rewarding and profitable.
Getting Started: Setting Up Your Publisher Account
First things first – you’ll need to head over to Boom Learning’s website and create an account. But here’s something that tripped me up initially: don’t just click on the regular “Sign Up” button! You’ll want to specifically select “Seller Account” from the dropdown menu. I accidentally created a teacher account first and had to contact support to switch it (whoops!).
Speaking of teacher versus publisher accounts, let me break down the key differences. A teacher account lets you use and assign Boom Cards to students. But to become a Boom Learning publisher and sell your creations, you’ll need that seller account I mentioned. The seller account gives you access to the deck creation tools, sales analytics, and your own store page. It costs $35 annually, which I found was pretty reasonable considering the potential earnings.
Setting up your seller profile is crucial – and I learned this the hard way! My first profile was, well, let’s just say it wasn’t very professional. Here’s what you need to include:
- A professional profile picture (I use my brand logo)
- A detailed “About Me” section highlighting your teaching experience
- Your subject area specialties
- Grade levels you create for
- Links to your teaching blog or website (if you have one)
Now, let’s talk tools because this is where I initially tried to cut corners (big mistake!). Here’s what I consider essential for creating quality Boom Cards:
- A good image editing software (I use Canva Pro, but Photoshop works too)
- Audio recording equipment (even a decent smartphone mic will work)
- Screen recording software for tutorial videos (I love Screencastify)
- Storage space for your digital assets (Google Drive is my go-to)

Something that saved me tons of time was organizing my digital assets before I started creating cards. Create folders for your images, audio files, and card templates. Trust me, you don’t want to be digging through random downloads trying to find that perfect clipart you bought three months ago!
One detail that often gets overlooked when you become a Boom Learning publisher is setting up your payment information correctly. Boom Learning pays through PayPal, so make sure your account is verified and ready to receive payments. I remember waiting an extra month for my first earnings because I hadn’t completed all the PayPal verification steps.
Store setup is another crucial piece. Think of your store as your digital classroom – it needs to be organized and welcoming. Create clear categories for your products, use consistent cover images, and write detailed descriptions. I organize mine by subject area first, then by grade level. This makes it super easy for teachers to find exactly what they’re looking for.
A pro tip I wish I’d known earlier: before you start creating your first deck, spend some time exploring other successful sellers’ stores. Look at how they organize their resources, price their products, and write their descriptions. It’s not about copying – it’s about understanding what works in the marketplace.
Don’t forget about the technical requirements! You’ll need a reliable internet connection and an up-to-date browser (Chrome works best in my experience). Also, make sure your computer can handle running multiple tabs and programs simultaneously – you’ll often need to have your image editor, audio editor, and Boom’s deck creator all running at once.
The learning curve might feel steep at first, but Boom Learning provides excellent tutorials and support documents. Take advantage of these resources! I spent my first weekend just going through their training materials, and it saved me countless hours of trial and error later on.
Remember, setting up your account properly is the foundation for your success as a seller. Take your time with this initial setup – it’s much easier to start with good habits than to try to fix things later!
Creating Your First Boom Deck
Starting with your first deck can feel overwhelming, but I’ll break it down the way I wish someone had done for me. The deck creator has this super intuitive interface (though I definitely didn’t think so at first!). It’s basically like PowerPoint meets Google Forms, but way cooler. When you first open it, you’ll see options for different card types – multiple choice, drag and drop, type in, and more.
My first attempt at creating a deck was… interesting, to say the least! I tried to include every bell and whistle possible. Big mistake! Now that I’ve become a Boom Learning publisher with some experience under my belt, I know that simple and focused is often better. Start with a basic multiple choice deck to learn the ropes.
Here’s my tried-and-true process for creating a new deck:
- Plan your content on paper first (yes, really!)
- Create a template card with your consistent elements
- Design your first 3-5 cards completely
- Test them thoroughly
- Then create the rest of your deck
Let’s talk about question types because this is where the magic happens! Multiple choice is great for beginners, but don’t sleep on the drag and drop feature – kids absolutely love it! The type-in responses are perfect for spelling practice, and the audio recording feature? Game changer for language learning!
I learned a tough lesson about images early on. My first deck had huge image files that made the cards load slowly. Now I optimize all images before uploading them. Aim for file sizes under 300KB if possible. And please, please make sure you have the right to use any images! I use a combination of paid clipart and my own creations.
Audio is another game-changer, but it needs to be done right. I record in a quiet room (my closet, actually – the clothes help absorb echo!), and I always script my audio instructions beforehand. Keep your audio clips short and clear. Remember to enunciate – you’re talking to students!

Here are some of my non-negotiable best practices that I’ve developed:
- Consistent font sizes throughout the deck
- Clear, child-friendly instructions
- A progress bar to show students how many cards are left
- Immediate, specific feedback for both correct and incorrect answers
- Alternative ways to solve/answer for different learning styles
One thing that really helped me improve my decks was student feedback. Once I started paying attention to how actual kids were using my cards, I made some major changes to my design approach. For example, I noticed younger students struggled with drag-and-drop on small objects, so I started making those elements bigger.
The multimedia aspects can be tricky to balance. It’s tempting to add tons of animations and sounds, but remember – you want to enhance learning, not distract from it. I typically use animation for feedback (like a star burst for correct answers) and audio for instructions and positive reinforcement.
Testing is crucial! Before you publish, test your deck on different devices. What looks perfect on your computer might be awkward on an iPad. I learned this when my carefully positioned drag-and-drop elements went haywire on smaller screens.
Here’s a pro tip: create a template deck with your basic design elements, colors, and fonts. This saves so much time when you’re ready to create your next deck. Plus, it helps maintain consistency across all your products, which buyers really appreciate.
Remember that your first deck won’t be perfect, and that’s okay! My first attempt took me about 15 hours to complete. Now I can create a similar deck in about 3-4 hours because I’ve developed systems and templates. Focus on creating something useful and educational – you can always update and improve it later as you become more experienced.
The key to success is finding that sweet spot between educational value and engagement. Your cards need to teach effectively while keeping students interested enough to continue practicing. It’s a balance that takes time to master, but it’s so rewarding when you get it right!
Quality Standards and Requirements
When I first started to become a Boom Learning publisher, I was honestly overwhelmed by all the guidelines and requirements. Let me tell you – reading through that content guidelines document felt like studying for a teacher certification exam all over again! But now I understand why these standards are so important for creating quality educational resources.
Let’s dive into the content guidelines first. Boom Learning is serious about educational value, and they should be! Your decks need to be grade-appropriate, accurate, and aligned with educational standards. I learned this the hard way when my first deck got rejected because I hadn’t properly labeled the grade level and subject area. The platform has specific categories and tags that you need to use correctly to become a Boom Learning publisher who stands out in the marketplace.
Copyright – oh boy, this is a biggie! I remember having a minor panic attack when I realized I couldn’t just use any cute clipart I found on Google Images. Here’s what you absolutely need to know about image usage:
- Only use images you’ve created or purchased with commercial licenses
- Keep all your image licenses organized in a folder (trust me on this one!)
- Document where every image came from
- Be extra careful with character images or brand names
- Never use images from Google without proper licensing
One thing that caught me off guard was the font requirements. You can’t just use any font you download – you need to ensure you have commercial rights for everything in your deck. I now stick to a combination of Google Fonts (which are free for commercial use) and fonts I’ve purchased specifically for my Boom Cards.
Accessibility is something I’m really passionate about. After teaching in a diverse classroom, I realized how important it is to make resources that work for all learners. Here are some accessibility features I always include:
- Clear audio instructions
- High contrast colors for text and backgrounds
- Large, readable fonts (no fancy decorative fonts for instruction text)
- Multiple ways to interact with the content
- Simple, uncluttered layouts
The technical specs are super important too. Each deck has specific requirements:
- Maximum file sizes for images (keep them under 300KB)
- Audio file formats (MP3 works best)
- Card quantity (minimum of 10 cards per deck)
- Image resolution requirements (at least 72 DPI)
- Browser compatibility considerations
Here’s something that surprised me – Boom Learning has specific requirements about feedback messages. They want them to be constructive and encouraging, not just “Good job!” or “Try again.” I now create specific feedback for different types of wrong answers to help guide students toward understanding.
Storage management is crucial too. I learned to keep my multimedia elements organized in specific folders:
- Images folder with subfolders by subject
- Audio clips folder organized by deck
- Template files folder
- License documentation folder
One of my biggest technical headaches early on was card loading speed. If your cards take too long to load, students lose interest fast! I now compress all my images and audio files before uploading them. It makes a huge difference in performance.
The review process can be nerve-wracking when you’re new. Boom Learning reviews each deck before it goes live to ensure it meets all their quality standards. My first few submissions got kicked back for various reasons – missing alt text on images, unclear instructions, and even a typo in the description. Now I use a checklist before submitting anything.
Let’s talk about testing requirements. Before submitting a deck, you need to:
- Test on multiple devices (desktop, tablet, phone)
- Check all audio plays correctly
- Verify all interactions work as intended
- Ensure feedback is appropriate and helpful
- Test with different browsers
Version control is something I wish I’d understood better at first. Keep track of all your changes and updates to decks. When you make significant updates, you’ll need to notify your buyers – it’s part of maintaining good seller ratings.
Above all, remember that these standards exist to ensure students get high-quality educational resources. While it might seem like a lot to handle at first, these requirements help you create better products that teachers and students will actually want to use. And when you consistently meet these standards, you’ll build a reputation as a reliable, professional publisher.
Marketing and Selling Your Boom Cards
Let’s talk about titles and descriptions first. You know how sometimes you’re searching for something specific on Amazon, and it just won’t show up unless you use exactly the right words? The same principle applies here. I’ve found that including grade levels, subject areas, and specific skills in your titles makes a huge difference. For instance, instead of “Addition Practice,” try “2nd Grade Math: Two-Digit Addition with Regrouping (Digital Task Cards).” I’ve seen my sales jump significantly just from this kind of optimization.
For descriptions, I learned a neat trick from another successful Boom Learning publisher: start with your most important information in the first two lines. Teachers are busy people! Include specific Common Core standards when applicable, and always list the exact number of cards and questions included. I also make sure to mention if my deck includes audio instructions or self-checking features – these are major selling points.
Now, about those cover images – they’re like the book cover of your digital resource. I used to create basic covers in PowerPoint (embarrassing, I know), but investing time in learning Canva was a game-changer. Your cover should be clear enough to read as a thumbnail but eye-catching enough to make someone stop scrolling. I always include a visual example of what’s inside the deck and make sure my grade level is prominently displayed.
When it comes to pricing, here’s something that took me way too long to figure out: don’t undersell yourself! I started by pricing everything at $1.99 because I was nervous about charging more. After doing some market research (aka spending hours analyzing successful sellers’ stores), I realized I was leaving money on the table. Now I use a tiered pricing strategy based on the number of cards and complexity of the content. Mini-decks might be $2.99, while comprehensive units can go for $5.99 or more.
Building your brand as a Boom Learning publisher isn’t just about individual decks – it’s about creating a cohesive presence. I maintain a consistent color scheme and font across all my resources, making them instantly recognizable. This has helped me build a loyal following of teachers who know exactly what to expect from my materials.

Here’s a pro tip that surprisingly few people talk about: create seasonal content at least 6-8 weeks before the actual season or holiday. Teachers plan ahead, and you want your resources to be there when they’re doing their planning. I learned this the hard way after releasing Halloween activities two weeks before October 31st and watching them sit unsold until the following year.
Growing your audience takes time, but there are ways to speed up the process. I collaborate with other Boom Learning publishers for cross-promotion, maintain an active presence in teaching Facebook groups (without being spammy!), and always respond promptly to questions and feedback on my decks. Remember, every interaction is an opportunity to showcase your professionalism and expertise.
One mistake I see new publishers make is trying to create resources for every subject and grade level. Instead, focus on becoming known for something specific. Maybe you’re the go-to person for kindergarten phonics games, or perhaps you specialize in middle school science review activities. This specialization helps you become a Boom Learning publisher that teachers trust for specific types of content.
Lastly, don’t forget about the power of previews! I always include 3-4 cards that truly represent the quality and style of the full deck. Think of it as a movie trailer – you want to show your best content without giving everything away. I’ve found that well-crafted previews significantly reduce refund requests because buyers know exactly what they’re getting.
Remember, success on Boom Learning isn’t just about creating great educational content – it’s about making sure the right teachers can find and trust your resources. Keep refining your approach, stay consistent with your branding, and don’t be afraid to adjust your strategies based on what the data tells you.
Growing Your Boom Learning Business
Let’s dive into the content guidelines first. Boom Learning is serious about educational value, and they should be! Your decks need to be grade-appropriate, accurate, and aligned with educational standards. I learned this the hard way when my first deck got rejected because I hadn’t properly labeled the grade level and subject area. The platform has specific categories and tags that you need to use correctly to become a Boom Learning publisher who stands out in the marketplace.
I remember having a minor panic attack when I realized I couldn’t just use any cute clipart I found on Google Images. Here’s what you absolutely need to know about image usage:
- Only use images you’ve created or purchased with commercial licenses
- Keep all your image licenses organized in a folder (trust me on this one!)
- Document where every image came from
- Be extra careful with character images or brand names
- Never use images from Google without proper licensing
One thing that caught me off guard was the font requirements. You can’t just use any font you download – you need to ensure you have commercial rights for everything in your deck. I now stick to a combination of Google Fonts (which are free for commercial use) and fonts I’ve purchased specifically for my Boom Cards.
Accessibility is something I’m really passionate about. After teaching in a diverse classroom, I realized how important it is to make resources that work for all learners. Here are some accessibility features I always include:
- Clear audio instructions
- High contrast colors for text and backgrounds
- Large, readable fonts (no fancy decorative fonts for instruction text)
- Multiple ways to interact with the content
- Simple, uncluttered layouts
The technical specs are super important too. Each deck has specific requirements:
- Maximum file sizes for images (keep them under 300KB)
- Audio file formats (MP3 works best)
- Card quantity (minimum of 10 cards per deck)
- Image resolution requirements (at least 72 DPI)
- Browser compatibility considerations

Here’s something that surprised me – Boom Learning has specific requirements about feedback messages. They want them to be constructive and encouraging, not just “Good job!” or “Try again.” I now create specific feedback for different types of wrong answers to help guide students toward understanding.
Storage management is crucial too. I learned to keep my multimedia elements organized in specific folders:
- Images folder with subfolders by subject
- Audio clips folder organized by deck
- Template files folder
- License documentation folder
One of my biggest technical headaches early on was card loading speed. If your cards take too long to load, students lose interest fast! I now compress all my images and audio files before uploading them. It makes a huge difference in performance.
The review process can be nerve-wracking when you’re new. Boom Learning reviews each deck before it goes live to ensure it meets all their quality standards. My first few submissions got kicked back for various reasons – missing alt text on images, unclear instructions, and even a typo in the description. Now I use a checklist before submitting anything.
Let’s talk about testing requirements. Before submitting a deck, you need to:
- Test on multiple devices (desktop, tablet, phone)
- Check all audio plays correctly
- Verify all interactions work as intended
- Ensure feedback is appropriate and helpful
- Test with different browsers
Version control is something I wish I’d understood better at first. Keep track of all your changes and updates to decks. When you make significant updates, you’ll need to notify your buyers – it’s part of maintaining good seller ratings.
Above all, remember that these standards exist to ensure students get high-quality educational resources. While it might seem like a lot to handle at first, these requirements help you create better products that teachers and students will actually want to use. And when you consistently meet these standards, you’ll build a reputation as a reliable, professional publisher.
The learning curve might seem steep, but don’t let it discourage you. Take it one step at a time, and soon these requirements will become second nature. Before you know it, you’ll be creating decks that not only meet but exceed these standards!
Ready to transform your teaching expertise into digital resources that can help educators worldwide? Starting your journey as a Boom Learning publisher might seem daunting at first, but with dedication and creativity, you can build a successful business sharing your educational materials. Remember, every successful publisher started with just one deck! Take that first step today and join the growing community of educators making a difference through digital learning resources.


You May Also Like

How to Develop a Profitable Niche Product in 2025: Ultimate Guide

Design Bundles vs Creative Fabrica: A Complete 2025 Comparison Guide for Digital Creators