
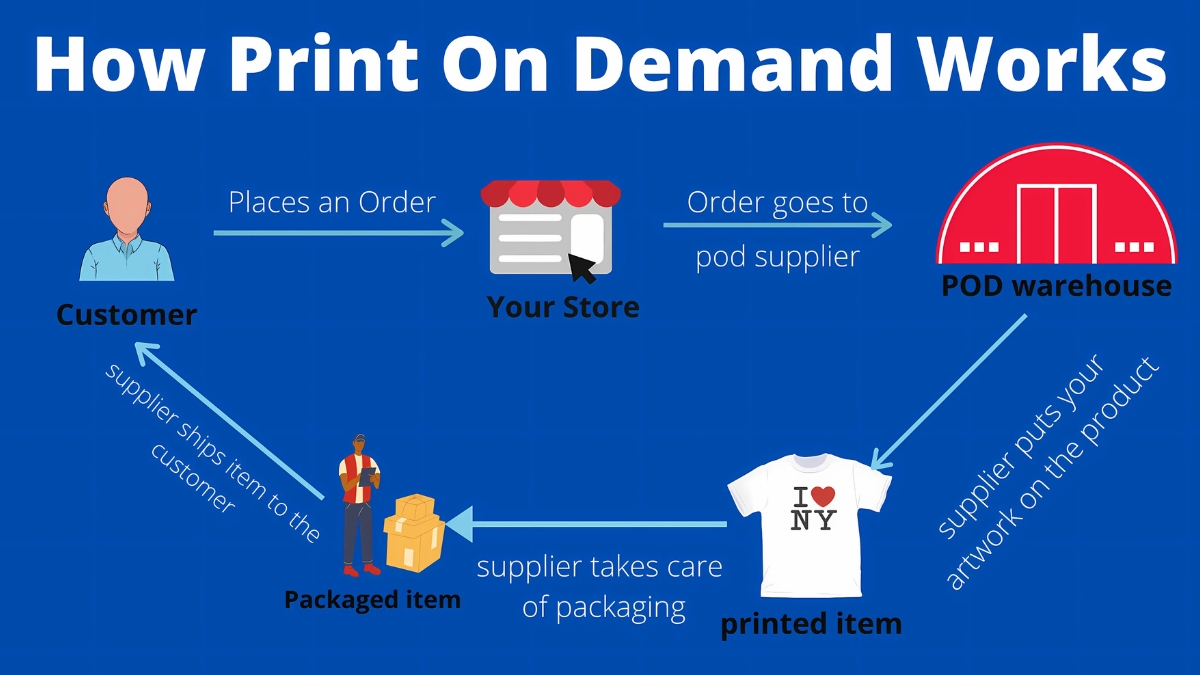
Did you know that the global print-on-demand market is projected to reach $39.1 billion by 2030? Whether you’re an aspiring designer or entrepreneur, creating successful print-on-demand designs could be your ticket to passive income success! In this comprehensive guide, we’ll walk through everything you need to know about creating designs that not only look great but actually sell. From choosing the right tools to understanding market trends, we’ve got you covered with actionable tips and insider secrets.
Essential Tools and Software for Print-on-Demand Design
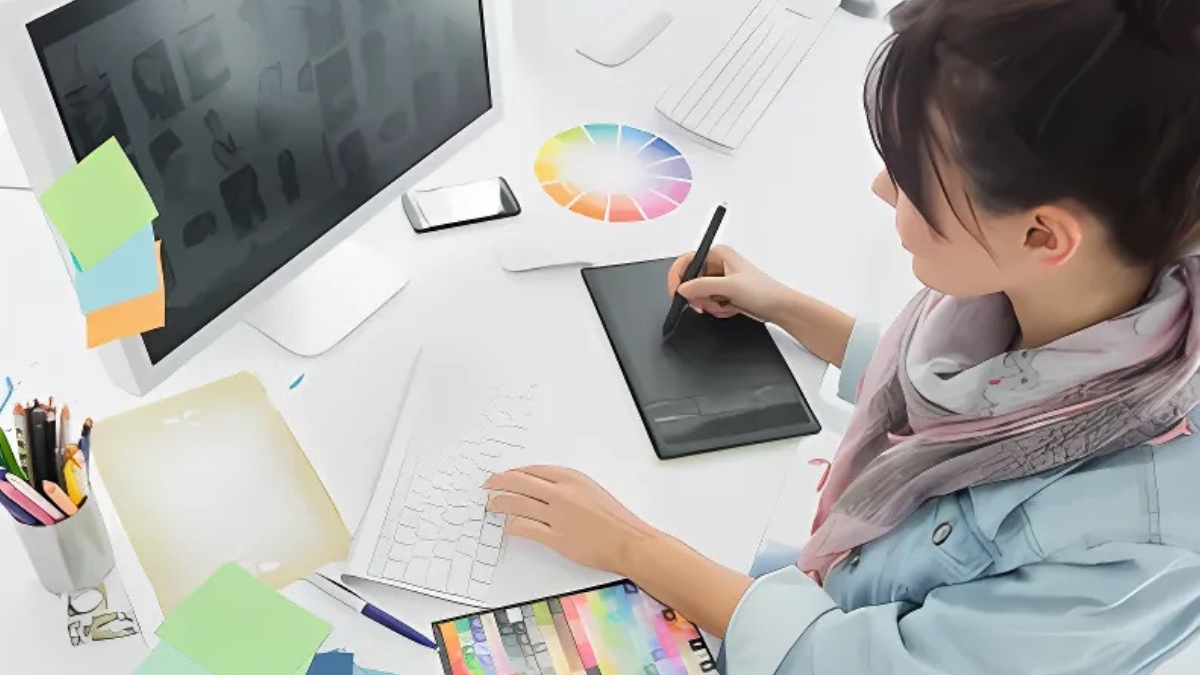
Let me tell you about my journey with print-on-demand design tools – and trust me, I’ve tried them all! When I first started trying to create print-on-demand designs, I made the classic newbie mistake of jumping straight into Adobe Illustrator without any proper training. Girl, was that a humbling experience! I sat there staring at all those intimidating tools and panels, feeling completely lost.
After that initial stumble, I decided to take a more sensible approach. I started with Canva Pro, which was honestly a game-changer for me. At $12.99 per month, it’s way more budget-friendly than Adobe’s Creative Cloud, and the learning curve is so much gentler. The best part? Canva Pro comes with a commercial license for their elements and built-in mockup tools, which are essential for creating print-on-demand designs quickly.
But here’s something I wish someone had told me earlier – you don’t actually need to spend money right away to start creating. There are some fantastic free tools out there! Inkscape is basically a free alternative to Illustrator, and while it might not be as polished, it handles vector graphics like a champ. GIMP is another solid option for photo editing and basic design work. I still use these sometimes when I’m working on simple projects.
Now, let’s talk technical specifications, because this is where I really learned some hard lessons. Each print-on-demand platform has different requirements, and getting these wrong can mess up your entire design. For example, Printful wants PNG files with 150 DPI for most products, while some other platforms might require 300 DPI. I learned this the hard way when one of my early t-shirt designs came out all pixelated – not my proudest moment!
Speaking of essential resources, I’ve built quite a collection over the years. Creative Fabrica and Font Bundles are my go-to sites for commercial-use fonts – they often have amazing deals where you can snag fonts with commercial licenses for just a few bucks. For mockups, Placeit has been worth every penny, but Smart Mockups offers some great free options too. I also keep a folder of templates for different products with safe zones marked out, which has saved me countless hours of resizing work.
One aspect that really tripped me up when I started to create print-on-demand designs was color profiles. Here’s the thing – what looks perfect on your screen might print completely different in real life. I now always work in CMYK color mode for print products, even though most POD platforms ask for RGB files. It helps me better predict how colors will look in the final product. And don’t get me started on the time I designed this beautiful gradient design without checking if the print provider could handle it!
The most valuable tool in my arsenal isn’t actually design software – it’s my organization system. I use Trello to keep track of my design ideas and their status (draft, ready for upload, listed, etc.). It helps me stay on top of seasonal designs and ensure I’m not missing any opportunities. I also keep a spreadsheet of which designs are uploaded to which platforms and their specifications – trust me, when you’re managing hundreds of designs, this becomes essential.
Remember, while having the right tools is important for creating print-on-demand designs, what matters most is how you use them. I’ve seen gorgeous designs made in basic programs and mediocre designs made with top-tier software. Start with what you can afford and upgrade as your skills and business grow. Focus on learning one tool really well rather than trying to master everything at once.
Understanding Print-on-Demand Product Requirements
One of my earliest disasters happened when I tried to create print-on-demand designs for multiple products without understanding how different printing methods work. I had this beautiful detailed illustration that looked amazing on t-shirts (direct-to-garment printing), but when I tried to use the same design for embroidered hats… well, let’s just say all those tiny details turned into a jumbled mess!
Here’s what you absolutely need to know about resolution requirements: Most POD platforms want at least 300 DPI for optimal print quality. But here’s a trick I discovered – when creating designs, I actually work at 400 DPI. This gives me flexibility to scale designs up without losing quality. For file formats, stick with PNG files for designs with transparency and JPEG for designs with solid backgrounds. And please, learn from my mistake – always save your original files in a vector format (like AI or SVG) so you can resize them without quality loss.
Safe zones and bleed areas were totally confusing to me at first. Think of it this way: the safe zone is like the “definitely will print” area, and the bleed area is your “just in case” space. For example, when I create print-on-demand designs for t-shirts, I keep all important elements at least 3 inches from the edges. One time, I ignored this rule and had text running right to the edge – ended up with some very unhappy customers when parts of their quotes got cut off!
Let’s talk about color – because this is where things get really interesting (and sometimes frustrating!). Different products and printing methods handle colors differently. Direct-to-garment printing can handle complex gradients and multiple colors, while vinyl cutting is best for simple, solid-color designs. I once created this gorgeous rainbow design for mugs without realizing the printer could only handle four colors – that was an expensive lesson in reading product specifications!
Here’s a quick cheat sheet I’ve developed for size requirements:
- T-shirts: 4500 x 5400 pixels for front/back designs
- Mugs: 3000 x 900 pixels for wrap-around designs
- Phone cases: 1800 x 3200 pixels with extra bleed area
- Canvas prints: Minimum 2400 pixels on the shortest side
Speaking of scaling, here’s a pro tip I wish I’d known earlier: When you create print-on-demand designs for multiple products, start with the largest size you’ll need and scale down, never up. I maintain a master file of each design at the largest required dimensions, then create smaller versions as needed. This has saved me countless hours of redoing designs.
Some platforms like Printful and Printify provide templates for their products, and I cannot stress enough how important it is to use these! They come with pre-marked safe zones and bleed areas, which takes a lot of the guesswork out of the process. I keep a folder of templates for each platform I work with, organized by product type.
One final piece of advice – always, always order samples of your products. Computer screens can be deceiving, and what looks perfect digitally might print completely differently. I’ve avoided many potential customer service headaches by catching printing issues in my sample orders.
Design Principles for Print-on-Demand Success
Speaking of color psychology, I’ve noticed that certain color combinations consistently outperform others. Navy blue paired with white or gold gives off a premium feel that sells well on apparel. Red and black create urgency that works great for motivational quotes. But here’s an interesting twist – I’ve found that designs with 2-3 colors typically sell better than complex multicolor designs. This is partly because simpler color schemes create print-on-demand designs that are more versatile across different product types.
Typography has been quite the journey of discovery! When I first started to create print-on-demand designs, I went crazy combining all sorts of fancy fonts. Big mistake! Now I stick to a simple rule: one decorative font paired with one clean, readable font. My current favorite combinations include:
- Brushwell with Montserrat
- Friday Spirit with Open Sans
- Golden Years with Roboto
Here’s something crucial about layout that took me ages to figure out – the rule of thirds really works! I use it as a starting point for almost all my designs now. But there’s a catch – you need to consider how the design will look on different products. A design centered perfectly for a t-shirt might look awkward on a phone case or mug.
Let me tell you about my “three-product rule” – I never finalize a design until I’ve previewed how it looks on at least three different products. This helps ensure versatility. For example, a design might look great on a t-shirt but be too detailed for a hat embroidery. I learned to create simplified versions of complex designs for products with printing limitations.

Balance is probably the trickiest principle to master. You want your designs to be simple enough to be readable from a distance but interesting enough to catch someone’s eye while scrolling through hundreds of products online. I’ve found that adding one unexpected element – like a small geometric shape or a subtle texture – can make a simple design more intriguing without overwhelming it.
Here’s a practical tip about composition that’s worked wonders for me: start with a larger canvas than you need and work your way in. This gives you more flexibility when adapting designs for different products. I typically start with a 5000×5000 pixel canvas, even if I’m designing for a smaller final size.
The biggest lesson I’ve learned about successful POD design is that less really is more. When I first started, I tried to cram every cool design element I knew into each piece. Now I know that white space isn’t just okay – it’s often what makes a design pop! Some of my best-selling designs are actually my simplest ones.
One final piece of advice – test your designs in grayscale. If they look good in black and white, they’ll usually work well in any color combination. This has become my go-to check before finalizing any design.
Market Research and Trend Analysis
When I first started trying to create print-on-demand designs, I was just throwing spaghetti at the wall to see what would stick. Spoiler alert: not much stuck! It wasn’t until I got serious about market research that things started to change. Let me share what I’ve learned about finding those golden opportunities in the POD world.
Here’s a funny story – I spent weeks creating elaborate cat designs, thinking I’d found the perfect niche. Turns out, while people love cats, the market was so saturated that my designs were lost in a sea of feline-themed merchandise! That taught me the importance of proper niche research. Now, I use tools like Google Trends, Pinterest Trends, and Merch Informer to identify sub-niches with high demand but lower competition. For example, instead of just “cats,” I might focus on “black cats in space” or “cats with programming jokes.”
Speaking of tools, let me share my daily research routine. I start by checking trending topics on Twitter and Reddit (especially subreddits related to my target niches). Then I hop over to Etsy and Amazon to analyze bestsellers. One game-changing discovery was using Google Trends’ related queries feature – it helps me create print-on-demand designs that capture emerging trends before they peak.
Here’s something that revolutionized my approach to competitor analysis: I started keeping a “swipe file” of successful designs in my target niches. Not to copy them (that’s a big no-no!), but to understand what makes them work. I look for patterns in:
- Color schemes that sell well
- Text placement and font choices
- The balance between images and text
- Price points that seem to work best

Seasonal planning has become my secret weapon. I learned (the hard way) that you need to create and upload seasonal designs at least 2-3 months before the actual season or holiday. I maintain a content calendar that looks something like this:
- January: Start Valentine’s Day designs
- March: Begin planning summer themes
- July: Start Halloween designs
- September: Christmas designs in full swing
Understanding your target audience is absolutely crucial. I once created what I thought was a hilarious programming joke design, only to realize I’d used terminology that was outdated by about five years! Now I immerse myself in my target communities. I join Facebook groups, follow relevant subreddits, and engage in conversations to understand what makes my audience tick.
Let me share a pro tip about trend analysis: Don’t just chase the obvious trends. Look for “evergreen trends” – topics that consistently sell well throughout the year. These become your bread and butter while you experiment with trending designs.
One of my biggest revelations was understanding the difference between a trend and a fad. Trends evolve slowly and last longer, while fads spike quickly and die just as fast. I’ve learned to create a mix of both types of designs – trendy ones for quick wins and evergreen designs for consistent sales.
Remember, successful market research isn’t just about finding what’s popular – it’s about finding what’s profitable and manageable for your specific situation. I focus on niches where I can create multiple designs quickly and where the audience is passionate enough to buy multiple items.
Creating Designs That Sell
Let’s talk about what actually makes designs sell. The bestsellers I’ve seen typically share some common elements:
- Clear, readable text (especially important for t-shirts viewed on small mobile screens)
- Strong contrast between elements
- A clear focal point that catches the eye
- Emotional connection with the target audience
- Unique twist on popular themes
I had this breakthrough moment when one of my simplest designs – a minimalist coffee quote with a tiny heart icon – started outselling all my detailed illustrations. That taught me an important lesson about creating print-on-demand designs that resonate with buyers: sometimes less really is more!
Here’s my process for incorporating trending phrases: I keep a running document of quotes and phrases I spot on social media, particularly TikTok and Instagram. But here’s the trick – don’t just copy trending phrases verbatim. Put your own spin on them! For example, if “living my best life” is trending, I might create variations like “living my best coffee life” for the caffeine-loving crowd.
Collections have been a game-changer for my sales. Instead of creating one-off designs, I now develop themes with 5-10 variations. Like this Valentine’s collection I made – started with a basic “Love” design, then created versions for dog lovers, cat parents, coffee addicts, and book nerds. Each design shared similar elements but spoke to different niches. The result? Much better overall sales than individual designs.
Testing is crucial, and boy, have I learned some interesting things! I use a simple spreadsheet to track which elements perform best:
- Color combinations that drive sales
- Text placement and size
- Popular phrases or themes
- Price points that convert best
- Products that sell most frequently

Speaking of pricing – this took some trial and error. I discovered that pricing strategies really depend on your design type and target market. For simple text-based designs, I stay in the middle range of market prices. But for more unique, artistic designs, I can command premium prices. The key is matching your pricing to perceived value.
Here’s a hard lesson I learned: don’t get too attached to your designs. Sometimes the ones you think are brilliant just don’t sell, while seemingly simple designs become bestsellers. Now I give each design about 30-60 days to prove itself. If it’s not selling, I either revise it or move on.
A tip about design variations that’s worked really well for me: create “mirror” designs. If a design works well with one niche, adapt it for others. For instance, a successful “Dog Mom” design might work just as well for cat lovers, plant parents, or book enthusiasts with some tweaking.
The most valuable lesson I’ve learned is the importance of watching your analytics. Pay attention to:
- Which products sell best with which designs
- Color combinations that consistently perform well
- Seasonal patterns in your sales
- Price points where sales peak
Want to know about any specific aspect of creating bestselling designs? I’d be happy to share more detailed strategies or examples from my experience!
Legal Considerations and Copyright
Let me share a real wake-up call I had. I created what I thought was an innocent parody design using a famous movie quote. A week later, I got a scary cease-and-desist email. That’s when I really started diving into copyright law and learning about what’s actually allowed when we create print-on-demand designs.
Here’s what I’ve learned about staying legal in the POD world. First, absolutely avoid using:
- Trademarked phrases or logos
- Song lyrics (yes, even a single line needs licensing!)
- Movie quotes (they’re usually copyrighted)
- Sports team names and logos
- University names and mascots
- Brand names and slogans
Finding legal design resources became my obsession after that early scare. Now I use sites like:
- Creative Fabrica (great for commercial-use fonts)
- Vexels (they have excellent POD-specific licenses)
- Design Bundles (clear commercial licensing terms)
- Font Bundles (for typography work)
- Creative Market (make sure to check license terms!)
Here’s something crucial about licensing that many newbies miss: there’s a big difference between “personal use” and “commercial use” licenses. I always spend the extra money for commercial licenses now. It’s way cheaper than dealing with legal issues later! And always, always keep records of your licenses and purchases.

Protecting your own designs is another important aspect I’ve learned about. While copyright exists automatically when you create something original, I take extra steps:
- Document my design process
- Save dated work files
- Keep records of when designs are published
- Use watermarks on preview images
- Register important designs with the copyright office
One of the trickiest areas I’ve encountered is parody law. While parodies can be legal, the line between parody and infringement is super thin. I now stick to this rule: if I have to ask whether something might be infringing, it probably is.
The biggest lesson I’ve learned about legal compliance? Having a system for vetting designs before uploading them. I actually created a checklist:
- Is every element original or properly licensed?
- Are any trademarked terms used?
- Could this design be confused with an existing brand?
- Do I have proof of licensing for all components?
- Have I documented my design process?
Remember, different print-on-demand platforms have different policies too. What might be okay on one platform could get you banned on another. I learned to carefully read each platform’s terms of service and keep up with policy changes.
Here’s a pro tip: building relationships with other POD designers can be super helpful for staying informed about legal issues. We often share updates about new regulations or potential pitfalls in our Facebook groups and forums.

Creating successful print-on-demand designs is an exciting journey that combines creativity with business savvy. Remember, the key to success lies in continuous learning, staying current with trends, and understanding your target market. Start with the basics, experiment with different styles, and always keep your audience in mind. Ready to transform your creative ideas into profitable designs? Take action today by choosing your first design tool and creating your initial concept!


Leave a Reply