How to Sell Clip Art on GraphicRiver: A Complete Guide for Digital Artists
Did you know that the digital art market is expected to reach $13.8 billion by 2025? With platforms like GraphicRiver leading the charge, there’s never been a better time to start selling your clip art online! I’ve helped dozens of artists establish successful shops on GraphicRiver, and in this guide, I’ll share everything you need to know to turn your artistic talents into a profitable business. Whether you’re a seasoned illustrator or just starting out, let’s dive into the exact steps you’ll need to take to succeed on this dynamic marketplace!
Getting Started on GraphicRiver
First things first, let’s talk about setting up your account. Head over to GraphicRiver and click that “Become an Author” button – but here’s a pro tip that saved me hours of headache: gather all your documentation before you start. You’ll need a government-issued ID, proof of address, and your tax information. I learned this the hard way when my first application got stuck in limbo because I didn’t have my tax forms ready!
The verification process typically takes 2-3 business days, but mine took a full week because I hadn’t properly formatted my portfolio samples. Here’s exactly what you need to do: submit 3-5 of your best clip art pieces in both AI and EPS formats. Make sure they’re commercial-quality work – think professional, clean vectors with properly organized layers. Trust me, they really do check these details!
Speaking of quality standards, let me break down what GraphicRiver actually looks for. Your clip art needs to be:
- Vector-based (no raster graphics, folks!)
- Minimum of 4000×4000 pixels for any bitmap previews
- Created in CMYK color mode for print compatibility
- Organized with properly named layers
- Free from any traced or copyrighted elements
I remember getting my first submission rejected because I hadn’t properly outlined my fonts. What a rookie mistake! Now I always convert text to outlines before submitting.

For software, you’re going to need Adobe Illustrator – there’s just no way around it. While some artists try to use alternatives like Inkscape, I’ve found that Illustrator’s AI and EPS file formats are the gold standard on GraphicRiver. I also recommend getting a Photoshop subscription for creating those eye-catching preview images. You don’t need the whole Creative Cloud suite, but these two programs are essential.
Now, let’s tackle the trickiest part that confused me for months: licensing options. GraphicRiver offers two main licenses for clip art: Regular and Extended. Here’s the real deal – most of your sales will be Regular licenses, which allow your buyers to use the clip art in a single project. The Extended license costs more but lets buyers use your art in items for resale, like t-shirts or mugs.
A mistake I made early on was pricing all my items for Extended licenses, thinking I’d make more money. But this actually hurt my sales! Most buyers just need the Regular license, so now I price my items competitively for Regular licenses and let the Extended sales be a bonus.
One last thing that’s super important – make sure you understand GraphicRiver’s exclusivity rules. When I started, I didn’t realize that if you choose to be an exclusive author, you can’t sell your clip art anywhere else online. The trade-off? You’ll earn higher commissions (up to 70% instead of the standard 50%). I eventually chose to go exclusive because the higher commission rate made up for not selling on other platforms.
There you have it! Getting started on GraphicRiver isn’t rocket science, but these specific details can make or break your success on the platform. Take it from someone who learned these lessons the hard way – attention to detail in this initial setup phase will save you so much time down the road.
Creating Marketable Clip Art Collections
First, let’s talk about research because this is where I wasted so much time when I started. Instead of just drawing whatever I felt like (my first mistake!), I now spend about 2-3 hours each week analyzing trends. Here’s my exact process: I use Google Trends to spot upcoming seasonal themes, follow design hashtags on Instagram and Pinterest, and – this is crucial – study GraphicRiver’s own bestseller list in the clip art category.
A game-changing tip I discovered? Look at wedding invitation designers on Etsy! These folks are usually 6-8 months ahead of general design trends, and they’re constantly updating their styles. Right now, I’m seeing a huge demand for botanical illustrations with a modern twist – think minimalist leaves with metallic accents.
When it comes to creating cohesive sets, I learned this the hard way: less is actually more. My early collections had like 500 different elements, and guess what? They barely sold. Now I focus on creating sets of 30-50 pieces that work perfectly together. Here’s my current formula for a successful collection:
- 10-15 main elements (larger, detailed pieces)
- 15-20 supporting elements (smaller variations)
- 5-10 borders or frames
- 3-5 pre-made compositions (this is super important – buyers love seeing how elements can work together!)
Organization is another area where I really messed up at first. My files were a complete mess! Now I use this specific folder structure that has saved me countless hours: /ProjectName_v1 /Source Files /AI Files /EPS Files /Preview Images /Sample Compositions /Documentation
For file naming, I used to just use random numbers (don’t do that!). Now I use this format: ProjectName_ElementType_Version (example: BotanicalWinter_Frame_01). This makes updating collections so much easier, and buyers appreciate the organization too.
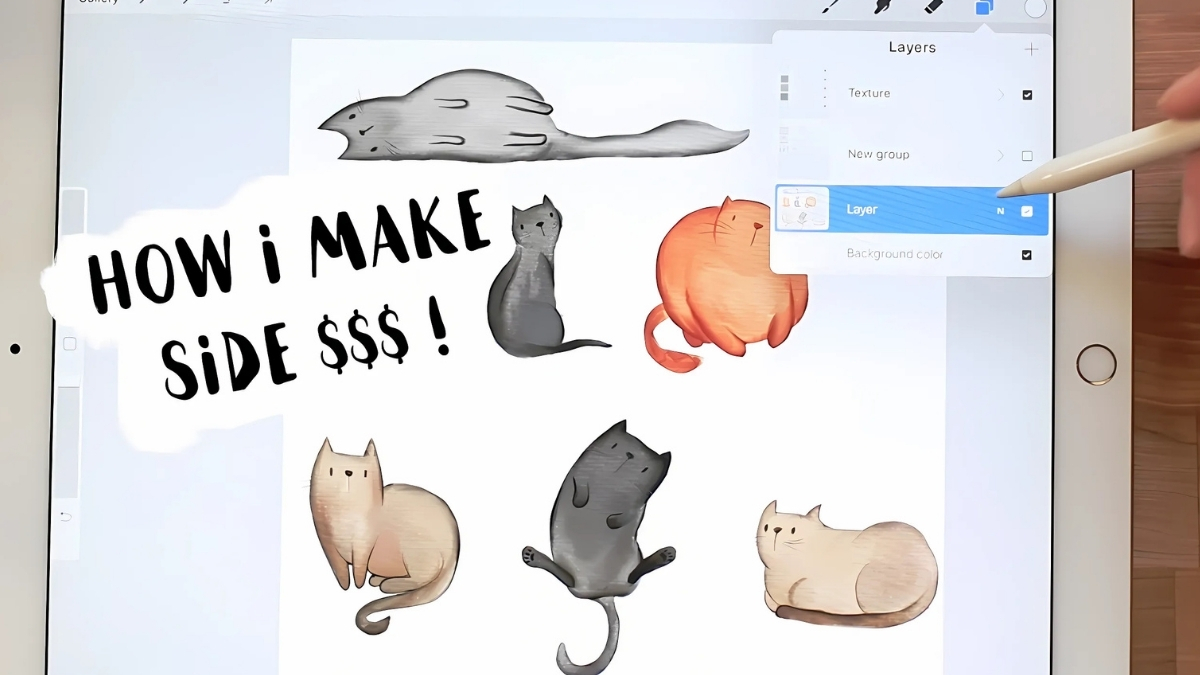
The trickiest part? Developing your own style while keeping things commercial. I spent months trying to copy other successful artists until I realized that wasn’t the way to go. Instead, I started incorporating one unique element into each collection – for me, it’s adding subtle texture overlays to vector elements. This became my signature touch, and now buyers actually look for it!
Here’s something nobody talks about: color palettes can make or break your sales. I always create three versions of each collection:
- Classic (black and white)
- Seasonal (trending colors)
- Metallic (gold and silver variations)
This tripled my sales because it gives buyers options without them having to modify the files themselves.
A super specific tip that’s worked wonders: include at least one “hero piece” in each collection – a more complex, showcase element that looks amazing in previews. I usually spend about 25% of my total design time on just this one piece, but it’s worth it because it draws buyers in.
The biggest lesson I’ve learned? Test your collections with real projects before uploading. I actually create a mock invitation or social media post with each set. If something feels awkward to work with, buyers will definitely notice too.
Remember, your first few collections probably won’t be perfect – mine sure weren’t! But if you focus on creating well-organized, cohesive sets that solve specific design needs, you’ll start seeing those sales roll in. Just keep refining your process and paying attention to what your buyers are actually using the elements for.
Technical Requirements and File Preparation
The file format requirements are super specific, and here’s what took me forever to get right: you need to provide both AI (Adobe Illustrator) and EPS files for every submission. But here’s the tricky part I discovered – they need to be compatible with older versions of Illustrator too. I wasted a whole week once because my files weren’t saving properly for CS6 compatibility! Now I always save two versions:
- AI file saved as Adobe Illustrator CC
- EPS file saved as Illustrator 10 EPS (for maximum compatibility)
Resolution requirements caught me off guard at first. Even though we’re working with vectors (which are technically resolution-independent), your preview images need to be at least 4000×4000 pixels at 300 DPI. I used to make them smaller to save time, but larger previews actually help your clips stand out in search results. Here’s my current export settings that never get rejected:
- Preview PNG: 4500x4500px at 300 DPI
- Thumbnail JPG: 1160x772px at 72 DPI
- Screenshots: 2000x2000px at 300 DPI
Let’s talk about color modes because this is where things get really technical. GraphicRiver requires all clip art to be in CMYK color mode for the source files. But – and this is important – your preview images should be in RGB! I messed this up for months until another artist pointed out why my previews looked dull. Here’s my current workflow:
- Create in RGB (it’s easier to design this way)
- Convert to CMYK for final source files
- Save a copy in RGB for previews
- Double-check all colors after conversion (some bright colors can shift dramatically!)\

Creating effective preview images was something I completely underestimated when starting out. They’re actually crucial for sales! After lots of testing, here’s what works best:
- Show the elements both individually and in composition
- Include a scale reference (I add a business card mock-up)
- Display different color variations if included
- Add a zoom detail of intricate parts
For vector file preparation, organization is everything. Here’s my checklist that’s never failed a review:
- Outline all fonts (Object > Create Outlines)
- Expand all strokes (Object > Expand Appearance)
- Clean up unnecessary anchor points (Object > Path > Clean Up)
- Organize layers logically (I group by element type)
- Name all layers clearly
- Remove any hidden layers or objects
One technical requirement that often gets overlooked is file size optimization. I spent ages figuring out why some of my files were unnecessarily large. The solution? Always run Object > Path > Simplify on complex vectors before finalizing. This reduced my file sizes by about 40% without any visible quality loss.
A compatibility tip that saved my bacon: always test your files on different versions of Illustrator. I keep a virtual machine with Illustrator CS6 installed just for testing. Nothing’s worse than getting customer complaints about compatibility issues!
The most important technical lesson I’ve learned? Document everything! I keep a README file in each collection with:
- Software version used to create the files
- Fonts used (even though they’re outlined)
- Color codes for all main colors
- Quick instructions for accessing grouped elements
These technical details might seem overwhelming at first – believe me, I know! But once you set up a proper workflow and checklist, it becomes second nature. Just remember to double-check everything before submission, because fixing technical issues after publication can be a real headache!
Optimizing Your Clip Art Listings
Let me share what I’ve learned about optimizing clip art listings after years of selling digital assets online. I still remember my first few months – talk about a learning curve! I’d spend hours creating beautiful designs only to have them buried on page 10 of the search results. Not exactly the dream scenario, right?
Here’s the thing about clip art listings that took me way too long to figure out: your gorgeous artwork isn’t worth much if buyers can’t find it. I learned this lesson the hard way when my winter wonderland collection barely got any views during the holiday season. The art was solid, but my optimization game? Not so much.
Let’s start with titles, because they’re absolutely crucial. I’ve found that a winning formula looks something like this: [Main Subject] + [Style] + [Format] + [Key Use Case]. For example, “Watercolor Succulent Plants PNG, Wedding Invitation Design Elements.” This hits all the key points a buyer might search for, while still reading naturally. Don’t just keyword stuff – I tried that once and got my listings pushed way down in search results.
For descriptions, I’ve developed a system that works pretty consistently. Start with a quick, engaging overview of what’s included (think specific numbers – “15 hand-drawn elements in high resolution”). Then break down the technical details: dimensions, file formats, and DPI. Something like this has worked well for me:
“This collection includes 15 individually hand-drawn succulent illustrations, perfect for creating stunning wedding stationery or botanical wall art. Each element is provided in:
- 300 DPI PNG format with transparent backgrounds
- High-resolution JPEG files
- Vector EPS files for scalability”
When it comes to keywords and tags, think like a buyer. What would someone actually type into the search bar? I keep a spreadsheet of performing keywords for different niches, and I’ve noticed that specific phrases often outperform generic ones. “Rustic wedding clipart” tends to do better than just “wedding clipart,” for instance.

For thumbnails, contrast is your best friend. I noticed a significant uptick in clicks when I started using light backgrounds for dark designs and vice versa. Make sure your main element takes up about 80% of the thumbnail space – I learned this after wondering why my more artistically-spaced thumbnails weren’t getting attention.
Pricing was probably the trickiest part for me to figure out. After some trial and error, I found that starting slightly below market average and gradually increasing prices as sales picked up worked best. I research similar items in my niche every month and adjust accordingly. Pro tip: don’t forget to factor in seasonal demand – I typically increase prices by 15-20% during peak wedding and holiday seasons.
One mistake I made early on was not updating older listings. Now I make it a point to refresh descriptions and keywords every few months based on what’s performing well. It’s amazing how a few tweaks to an old listing can suddenly bring it back to life in the search results.
Remember, optimization isn’t a one-and-done deal. The digital marketplace is constantly evolving, and what worked last year might not work as well today. Keep testing different approaches, track your results, and don’t be afraid to make changes when something isn’t working.
And please, learn from my mistake: keep backup copies of your listing details! Nothing’s worse than having to recreate everything from scratch because you forgot to save your carefully crafted description somewhere safe. Trust me on this one – I spent a whole weekend rebuilding listings after a platform glitch.
Building Your GraphicRiver Portfolio
These days, I swear by a consistent upload schedule. I’ve found that pushing out 2-3 new items every week works way better than dumping 20 items all at once and then disappearing for months. The marketplace algorithm seems to really dig that steady activity – kind of like feeding a hungry beast regular snacks instead of one huge meal.
Speaking of consistency, let’s talk about diversification because this was a game-changer for me. I remember putting all my creative energy into wedding-themed designs, only to watch sales plummet during the off-season. Now I maintain what I call my “portfolio pillars”:
- Business and corporate designs (steady year-round income)
- Seasonal and holiday items (planned 3-4 months ahead)
- Wedding and celebration elements (peaks in spring/summer)
- Social media templates (growing demand here!)
One strategy that’s worked incredibly well for me is creating themed collections. Instead of just making random Christmas icons, I developed complete holiday branding packages. Think coordinated social media posts, business cards, and letterheads all sharing the same visual style. Buyers love this stuff because it saves them time and ensures consistency in their projects.
Here’s something I wish someone had told me earlier: your portfolio isn’t just a collection of separate items – it’s an interconnected web of products that can support each other. I’ve boosted sales significantly by strategically linking related items in my descriptions. For example, if someone’s looking at my Valentine’s Day social media templates, they might also need matching Instagram story highlights or business card designs.
Cross-promotion has been huge for my success. One technique I’ve found particularly effective is creating “design systems” where elements from different items can work together. In my descriptions, I’ll often write something like: “These abstract shapes pair perfectly with my Modern Business Card Collection (link) for a complete branding package.” This has honestly doubled the average number of items per customer purchase.

The key to maintaining momentum is planning ahead. I keep a content calendar that maps out my uploads for the next three months. This helps me stay ahead of seasonal trends and ensures I’m not scrambling to create Christmas designs in December (been there, done that, never again!). I actually start working on holiday designs in summer, which felt weird at first but has paid off tremendously.
One mistake I made early on was trying to compete on price alone. Don’t do that! Instead, focus on creating value through unique, high-quality designs and comprehensive packages. I’ve found that buyers are willing to pay more for items that solve specific problems or save them time.
For new GraphicRiver authors, I always recommend starting with a focused niche and expanding gradually. Build a reputation in one area before branching out. And please, don’t forget to engage with your buyers through the comments section – their feedback has been invaluable in helping me understand what the market really wants.
Remember to keep an eye on GraphicRiver’s trending items in your category. Not to copy them, but to understand what styles and themes are resonating with buyers. I check these weekly and adjust my creation pipeline accordingly. It’s helped me stay ahead of trends instead of always playing catch-up.
The platform can feel overwhelming at first, but stick with it. Focus on quality over quantity, maintain that consistent upload schedule, and always think about how your items can work together to solve real problems for your buyers. That’s what turns occasional buyers into loyal customers who keep coming back for more.
Marketing and Promotion Strategies
You know what’s funny? I used to think creating great clip art was enough – just build it and they’ll come, right? Well, after months of crickets chirping around my perfectly good designs, I finally figured out that marketing isn’t just an optional extra. It’s absolutely essential, and I learned this lesson the hard way.
Let’s talk social media first, because this is where I started seeing real traction. Pinterest turned out to be an absolute goldmine for my clip art business. Here’s what I discovered works best: create gorgeous mock-ups of your designs in action – think wedding invitations featuring your floral elements, or business cards showcasing your logo designs. I noticed my pins started getting serious engagement when I focused on showing the practical applications rather than just the raw clip art.
Instagram requires a different approach entirely. I’ve found that mixing up my content works best – about 40% showcasing new designs, 30% behind-the-scenes glimpses of my creative process, and 30% sharing tips and tutorials. The stories feature has been particularly powerful for building genuine connections. I remember posting a story about struggling with a particularly complex mandala design, and the responses were incredible – turns out people love seeing the human side of the creative process!
Building an email list was something I resisted for ages (honestly, I thought nobody would want yet another newsletter in their inbox). But here’s the thing – when I finally bit the bullet and started one, it became my most valuable marketing tool. The secret? I offer a monthly free design bundle to subscribers. Yeah, I’m giving away some work, but the loyalty and consistent sales it generates make it more than worthwhile.
Here’s a specific strategy that worked wonders: I created a “Design of the Month Club” where subscribers get early access to new releases and special bundle pricing. The exclusivity factor really seems to resonate with customers, and it gives me a predictable baseline of sales each month.
Networking with other GraphicRiver authors seemed intimidating at first, but it’s turned into one of the most rewarding aspects of this journey. We’ve created informal partnerships where we cross-promote each other’s complementary products. For instance, I focus on floral designs while a colleague specializes in typography – our styles work great together, so we often recommend each other’s work to clients.

Your portfolio website is crucial, but here’s what took me forever to figure out: it shouldn’t compete with your GraphicRiver listings – it should complement them. I use my website to tell the story behind my designs, share detailed tutorials, and showcase real-world applications. Then I funnel visitors to my GraphicRiver listings for the actual purchases.
One thing that really moved the needle for me was creating content that shows people how to use my clip art effectively. I started a simple blog sharing design tips and tricks, and it’s become a steady source of traffic to my GraphicRiver portfolio. People seem to really appreciate learning how to make the most of the assets they purchase.
I made plenty of marketing mistakes along the way – like that time I spent way too much money on Facebook ads targeting the wrong audience (pro tip: generic targeting doesn’t work for specialized design assets). Or when I tried to maintain active accounts on every social platform and ended up doing a mediocre job on all of them. Now I focus on just three platforms and do them well.
The key is to be consistent with your marketing efforts. I block out specific times each week for social media updates, email newsletters, and blog posts. It’s tempting to let these slide when you’re busy creating new designs, but I’ve learned that maintaining a steady marketing presence is just as important as having a regular upload schedule.
Remember, effective marketing in this space isn’t about hard selling – it’s about educating, inspiring, and building genuine connections with your audience. Share your knowledge freely, engage authentically with your community, and the sales will follow naturally.
Enhance your digital marketing skills with the SEO and Social Media Marketing EBook Sets! These expertly crafted guides cover strategies for boosting website traffic, improving search rankings, and building a strong social media presence. Learn how to create engaging campaigns, analyze performance, and drive conversions effortlessly. Perfect for marketers, entrepreneurs, and businesses aiming to succeed online. Start transforming your digital strategy today!
Success on GraphicRiver comes down to combining artistic talent with smart business strategies. By following this comprehensive guide, you’ll be well-equipped to create and sell clip art that resonates with buyers and generates consistent income. Remember to stay current with design trends and continuously engage with your audience. Ready to start your journey as a GraphicRiver artist? Take the first step by setting up your account today!


